Attachments and Constraints
Attachments and Constraints
The Roblox physics system includes two fundamental types of components: attachments and constraints. At a general overview:
- An
Attachmentis where another object connects to a part. - A
Constrainttypically connects two attachments. Constraints include hinges, springs, motors, and other elements which can be used to build mechanisms or move objects physically.
Constraint Visualization
To view constraints and attachments, toggle on Constraint Details in the Model tab. This will turn on the full visualization system, complete with details and hover-over info boxes.
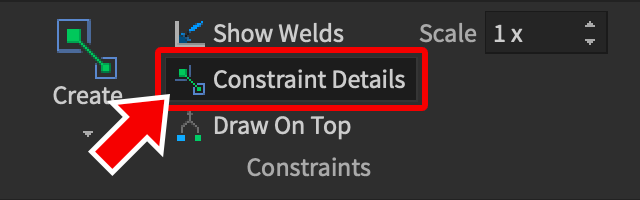
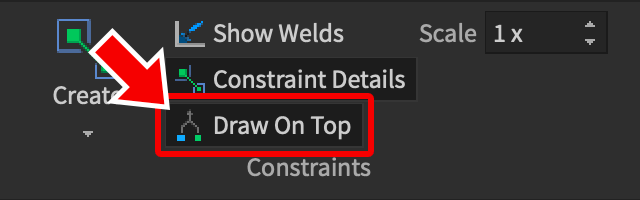
If desired, you can toggle Draw On Top to see constraint visualizations that are blocked by parts.
Creating Attachments
Create Tool
An attachment can be created from the Model tab by accessing the Create button’s drop-down menu and selecting Attachment.
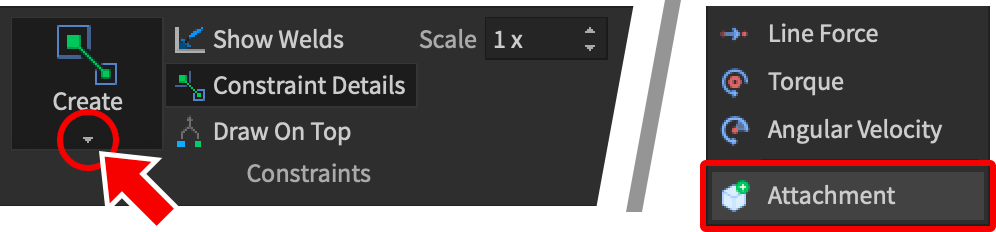
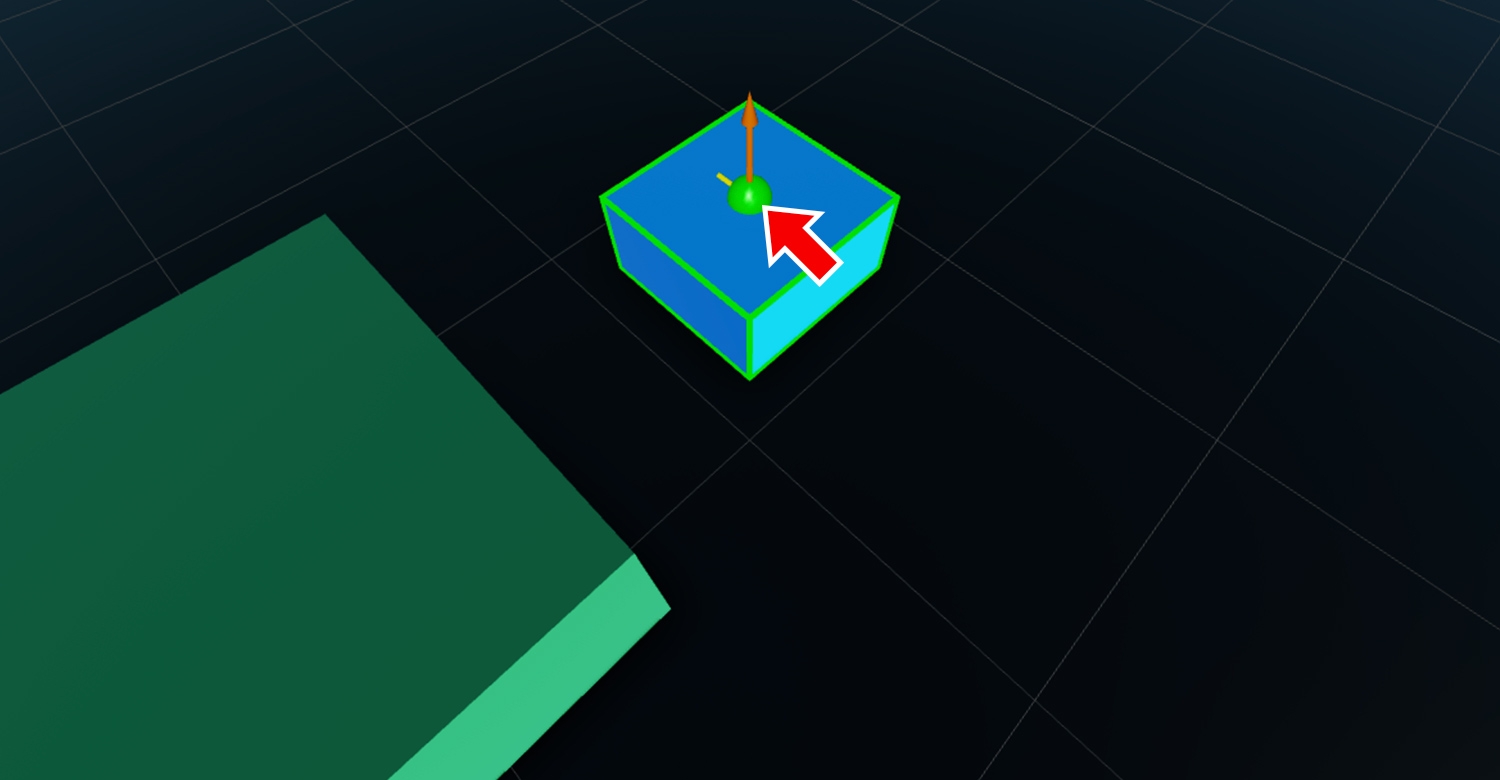
Once the tool is active, drag your mouse over the surface of a BasePart. When the attachment is in the desired position, click to create it.
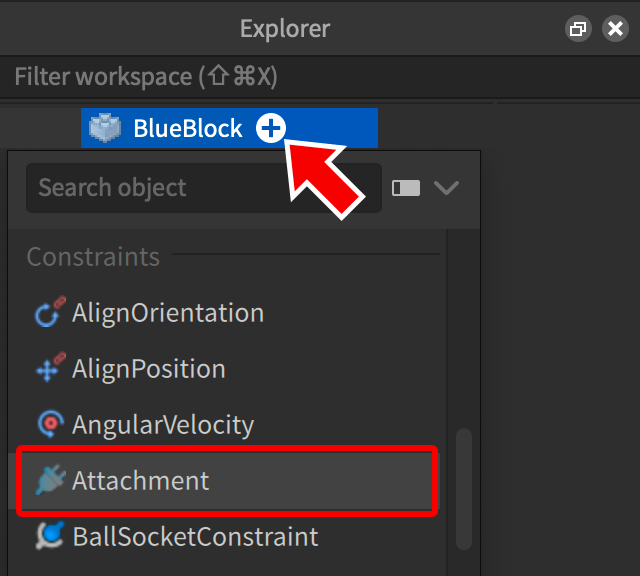
Explorer
Attachments can also be created by hovering over a BasePart in the Explorer window, clicking the ![]() button, and selecting Attachment from the context menu.
button, and selecting Attachment from the context menu.
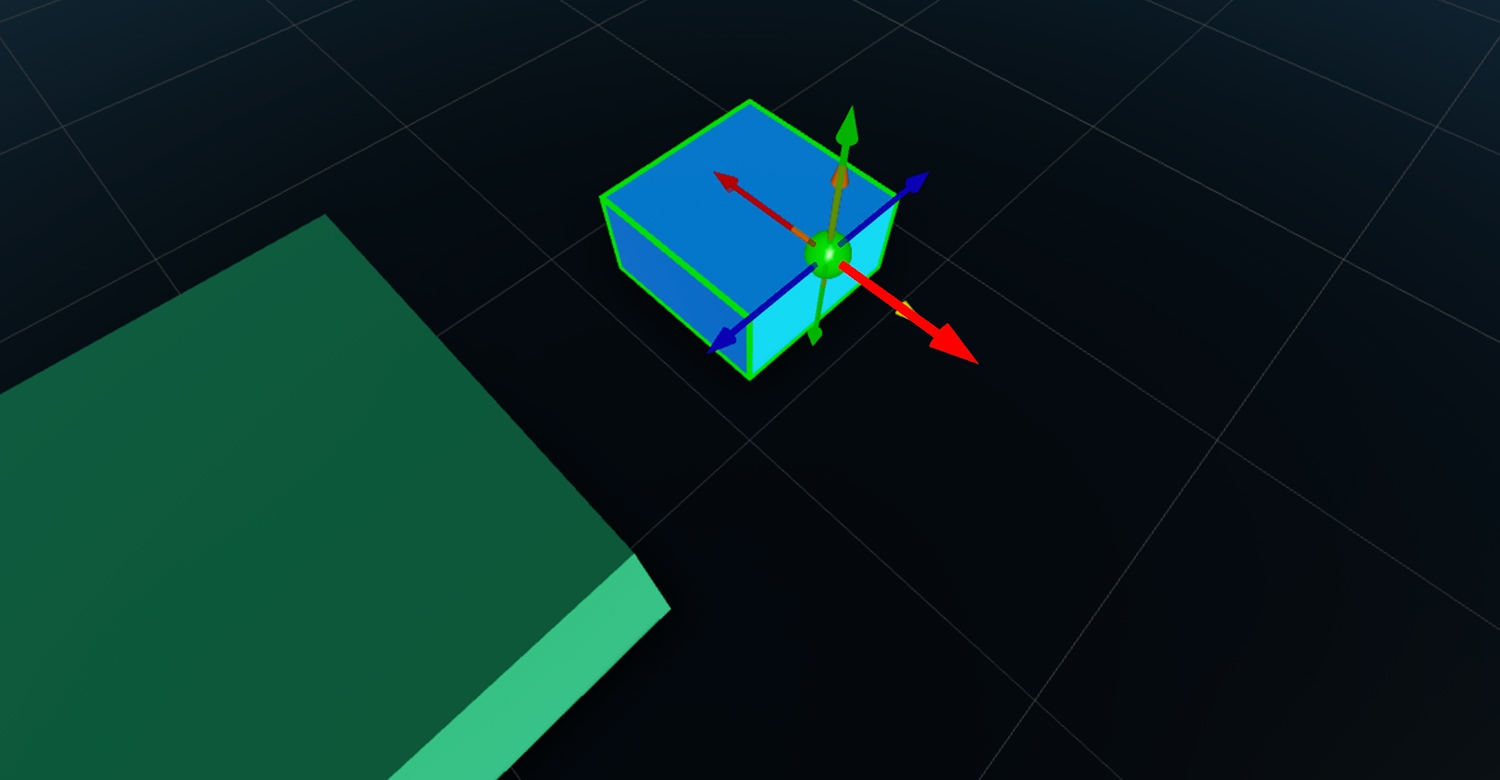
Positioning Attachments
Attachments can be positioned anywhere on a parent part, even outside its bounds. An attachment’s position is relative to its parent, meaning that an attachment with a position of 0, 0, 0 will always be at the center of the part, regardless of the part’s position in the game world.
To reposition an attachment, select it and move it with the Move tool.
Rotating Attachments
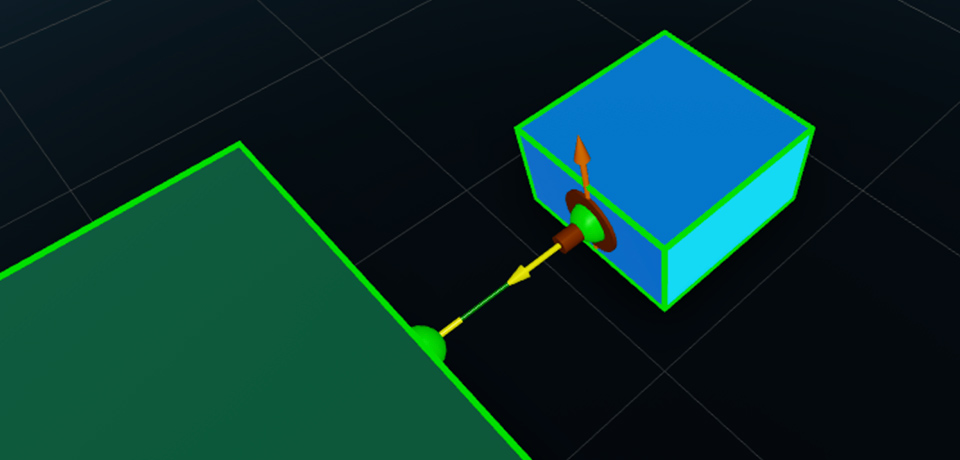
Attachments have an orientation as well as a position. Some constraint types require that their attachments are rotated correctly, otherwise the mechanism will not work as intended.
For example, a HingeConstraint forces two attachments to snap together when the game is run and lets them rotate. To make a hinge behave correctly, each attachment’s Axis — visualized by the yellow arrow — should point in the same direction.
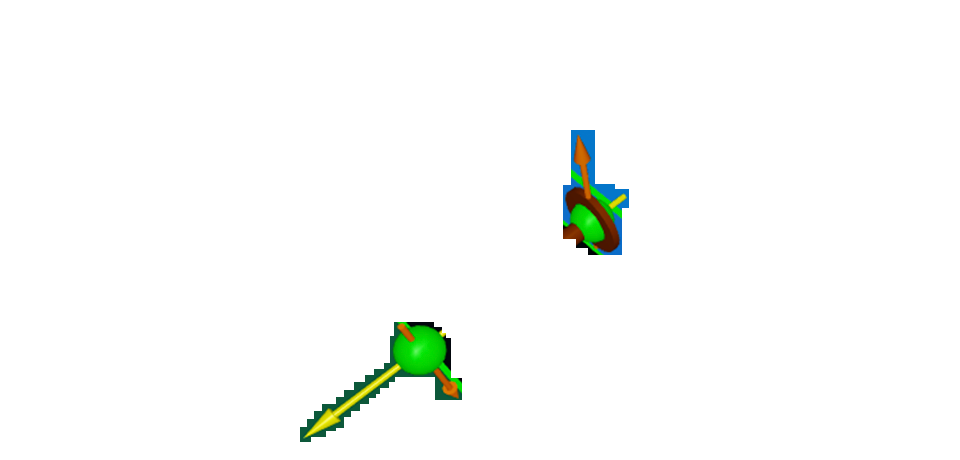
In contrast, if the axes are misaligned as demonstrated below, the parent parts will re-align at runtime, leading to unintended behavior.
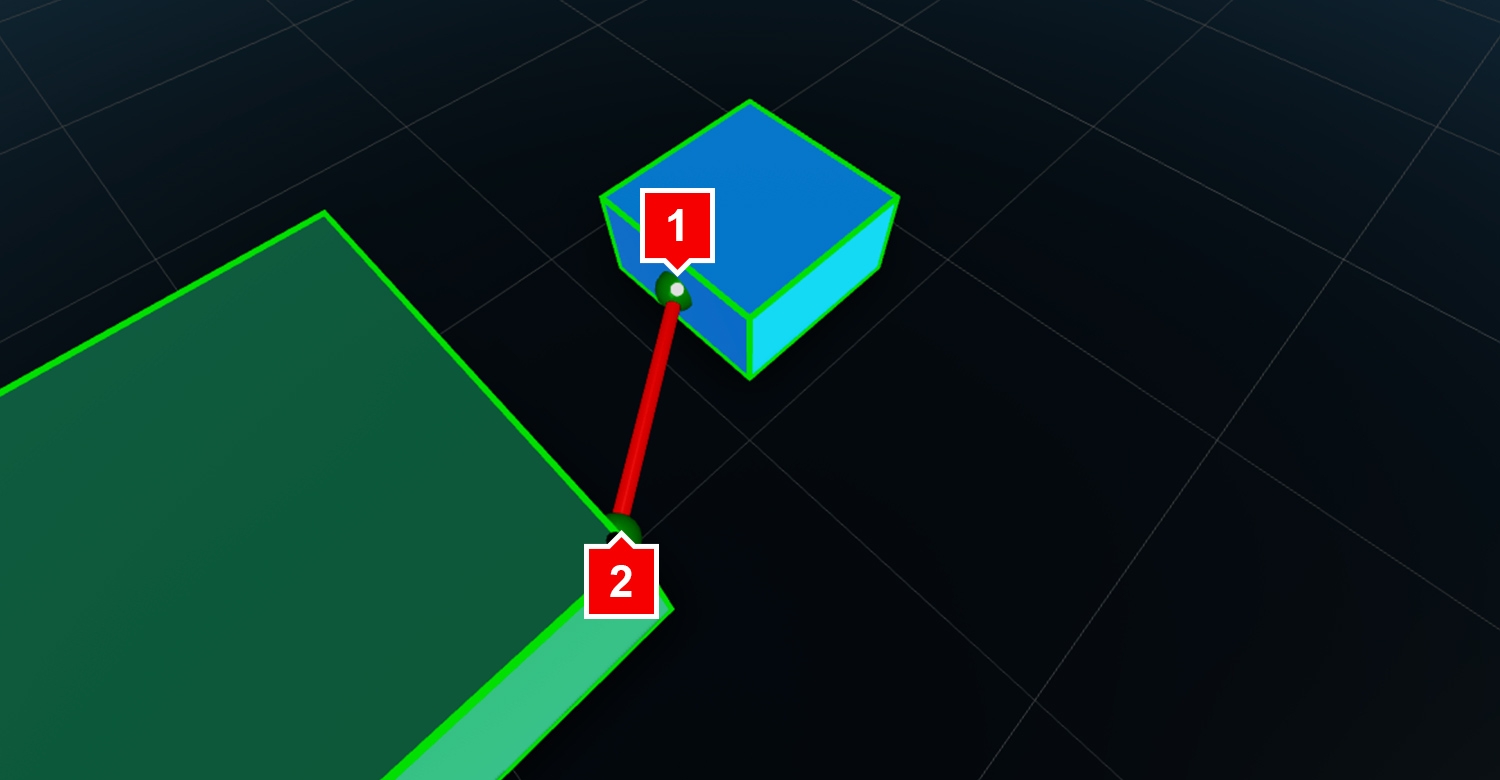
Creating Constraints
Constraints typically connect two attachments and are used to build mechanical constructions or move objects physically.
To create a constraint using the tool workflow:
- Access the Create button’s drop-down menu and select the desired constraint type, for example Rod.
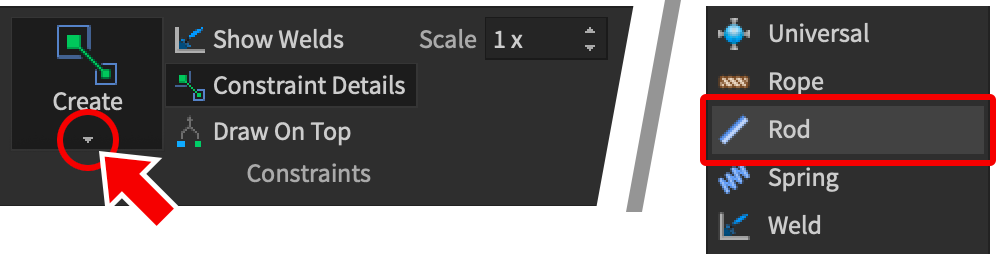
- On one part, click to place the first attachment and then — on the other part — click to place the second attachment. This will complete the connection with the chosen constraint type.
Enabling/Disabling Constraints
Constraints can be toggled on and off using their Constraint/Enabled|Enabled property. When disabled, a constraint will not apply any kind of force or torque on its attachments.
Solving Constraints While Dragging
When transforming a part that is attached with constraints, it’s often useful to “solve” those constraints while dragging the part’s move/rotate handles. This will force the part to obey physical limitations defined by its constraints.
To solve constraints while transforming parts, switch to Physical mode in the Model tab. The standard transform icons will change appearance to reflect the new mode.
