Importing Custom Characters
Importing Custom Characters
Roblox offers two options for importing custom characters, each with distinct benefits and requirements.
- R15 — Best for humanoid characters with the traditional look and functionality of Roblox.
- Custom — Great for non-humanoid characters such as animals, or for creating ultra-realistic animations. These characters are not compatible with
articles/roblox avatars|R15animations.
General Conventions
Each rig type has its own distinct naming convention, hierarchy, and required pattern for joint placement as outlined under R15 Rig Setup and Custom Rig Setup. However, there are some commonalities about how all rigs should be prepped in Blender or Maya.
- Units should be set to Centimeters.
- Mesh translate values should be (0, 0, 0) before being parented to the joints.
- Joint rotation values should all be (0, 0, 0).
- Joint scale values should remain at the default (1, 1, 1).
- Extra or hidden joints and meshes should be deleted before exporting the file.
- A maximum of one animation should be included (Studio will only recognize the first track if there are more).
R15 Rig Setup
For R15 models, each limb must be modeled as a separate piece. The image below shows the individual meshes slightly moved apart so you can see how each limb is sealed off as to be airtight.
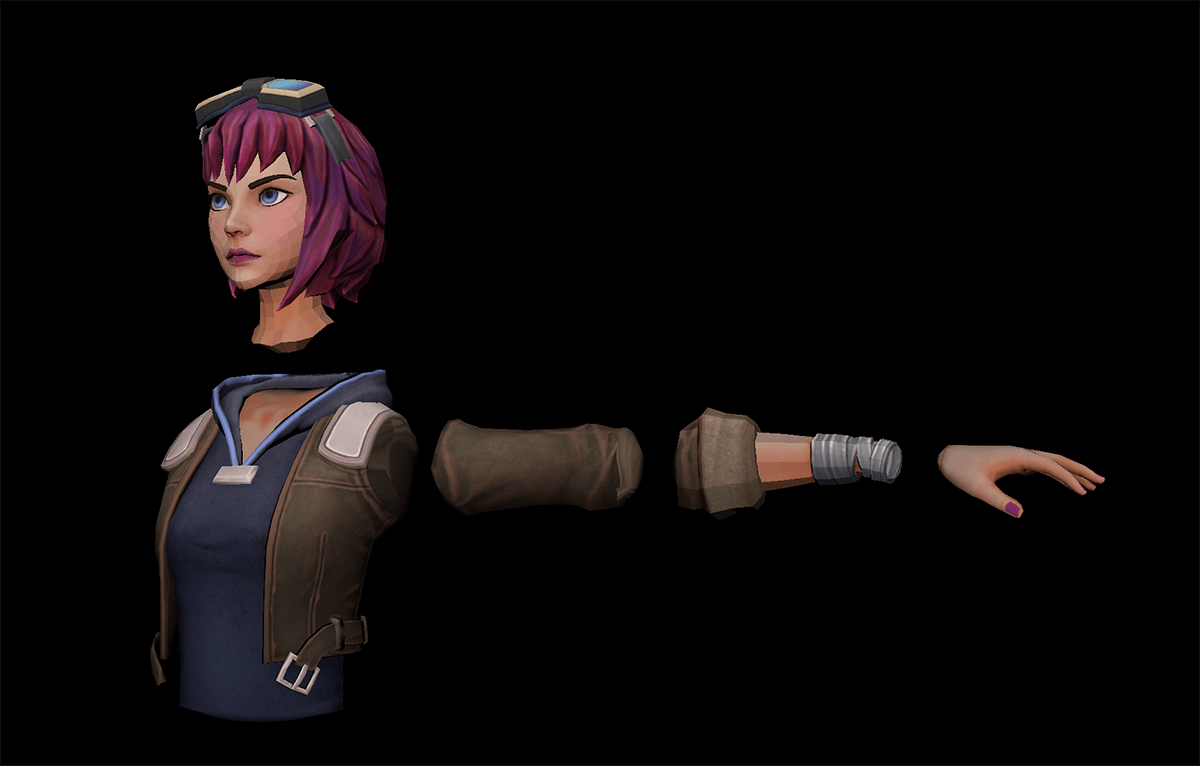
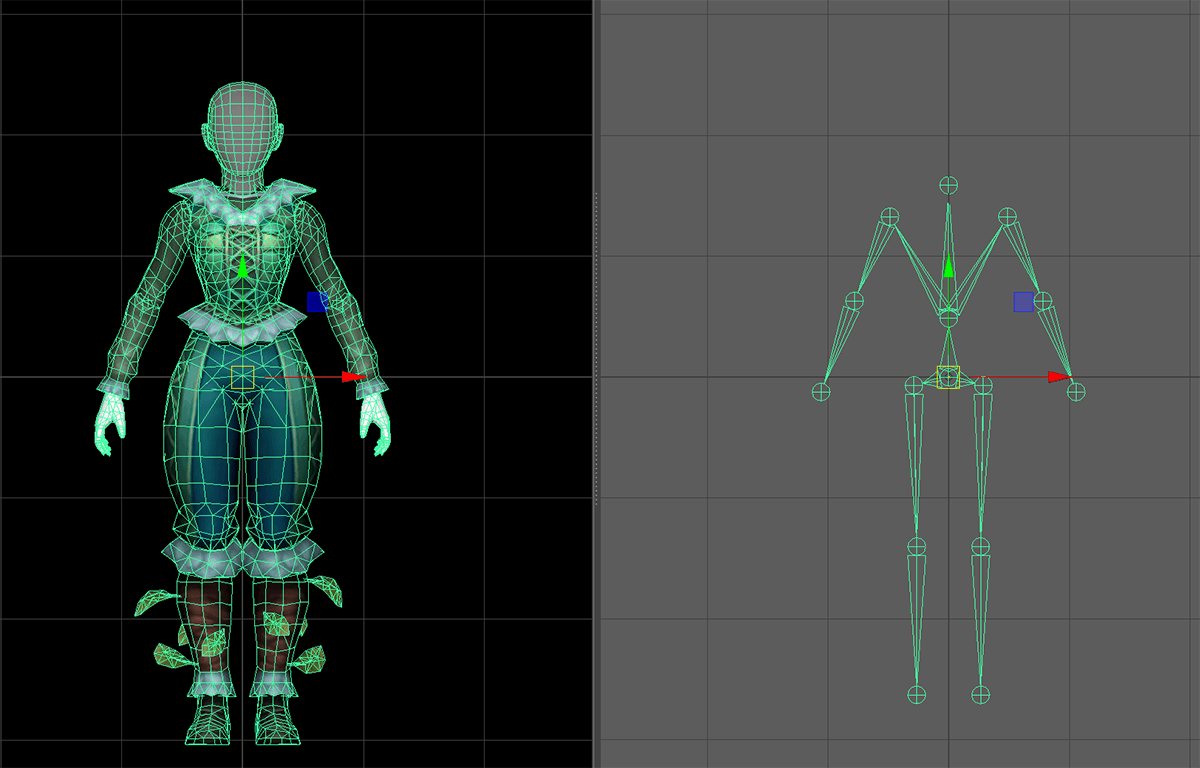
Furthermore, each limb must be parented to the joint. Note that the model is not in a T-pose, but instead the arms are down.
Heads / Faces
R15 avatars may be built with different head “types” and this determines if/when to apply a head or face texture.
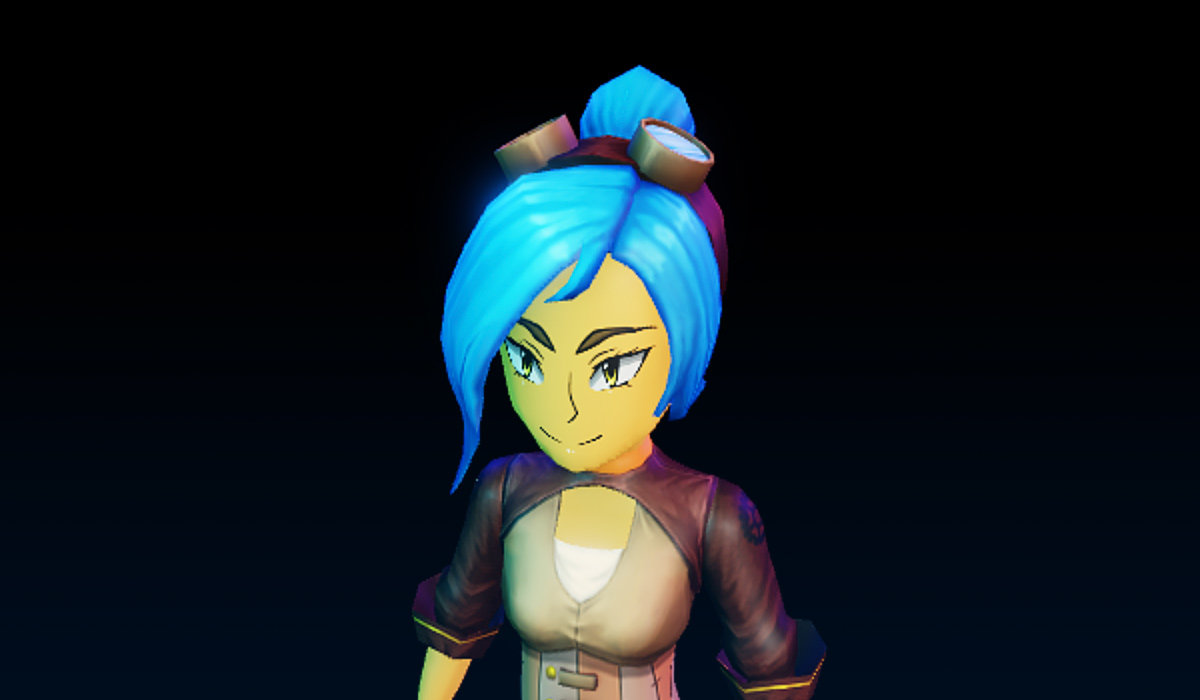
| Standard Head + 2D Face | Full 3D Head |
|---|---|
 |
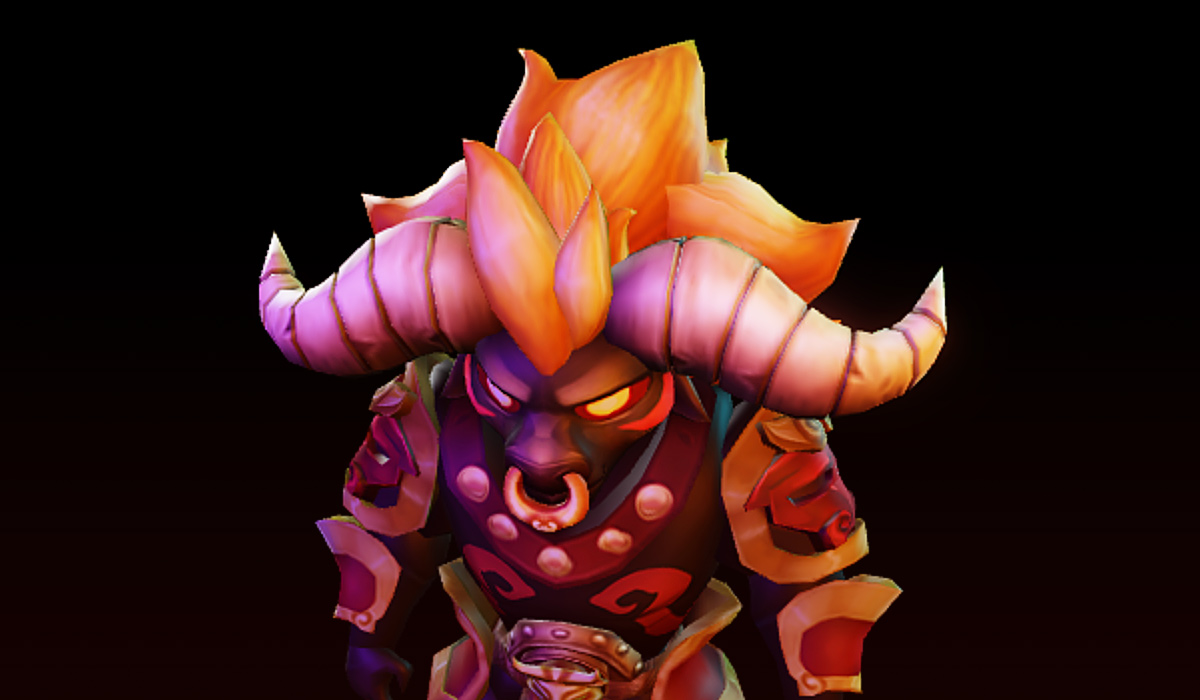 |
| This option uses a standard head type and a face texture can be applied once imported to Studio. For models like this, you should not assign a texture to the head geo when exporting from Blender/Maya. Also, the face "plane" should be relatively flat and devoid of geometric shapes like a sharp nose, eye sockets, etc. | A full 3D head typically won't have a facial texture added in Studio. For example, the Bull Demon King head/face will always look like a bull. For models like this, you should assign a texture to the head geo before exporting from Blender/Maya. |
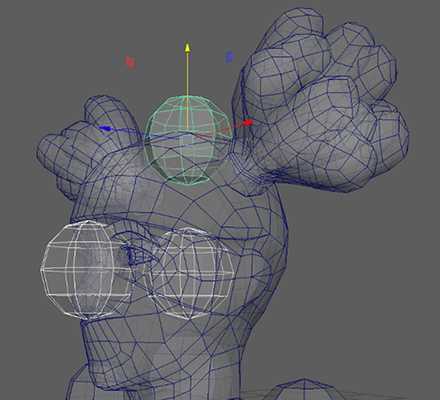
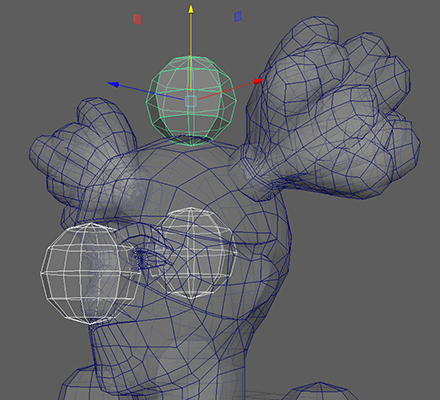
Attachments
Attachments are meshes which are positioned around the model, allowing Roblox character accessories to attach to it. When creating meshes for attachment placement, ensure that they’re properly embedded into the model’s mesh, and follow the naming convention in the overview below.
Attachment Points »
Naming the attachment meshes ensures that the correct Attachment instances are created in Studio. The list of attachments are as follows:
- FaceCenter_Att
- FaceFront_Att
- Hat_Att
- Hair_Att
- LeftGrip_Att
- LeftShoulder_Att
- LeftCollar_Att
- RightGrip_Att
- RightShoulder_Att
- RightCollar_Att
- Neck_Att
- BodyBack_Att
- BodyFront_Att
- WaistFront_Att
- WaistCenter_Att
- WaistBack_Att
- LeftFoot_Att
- RightFoot_Att
The attachments generated in Studio follow a similar naming schema where “_Att” is replaced with “Attachment”. For example, a 3D file with a BodyFront_Att mesh will import into Studio with a Attachment instance named BodyFrontAttachment automatically generated.


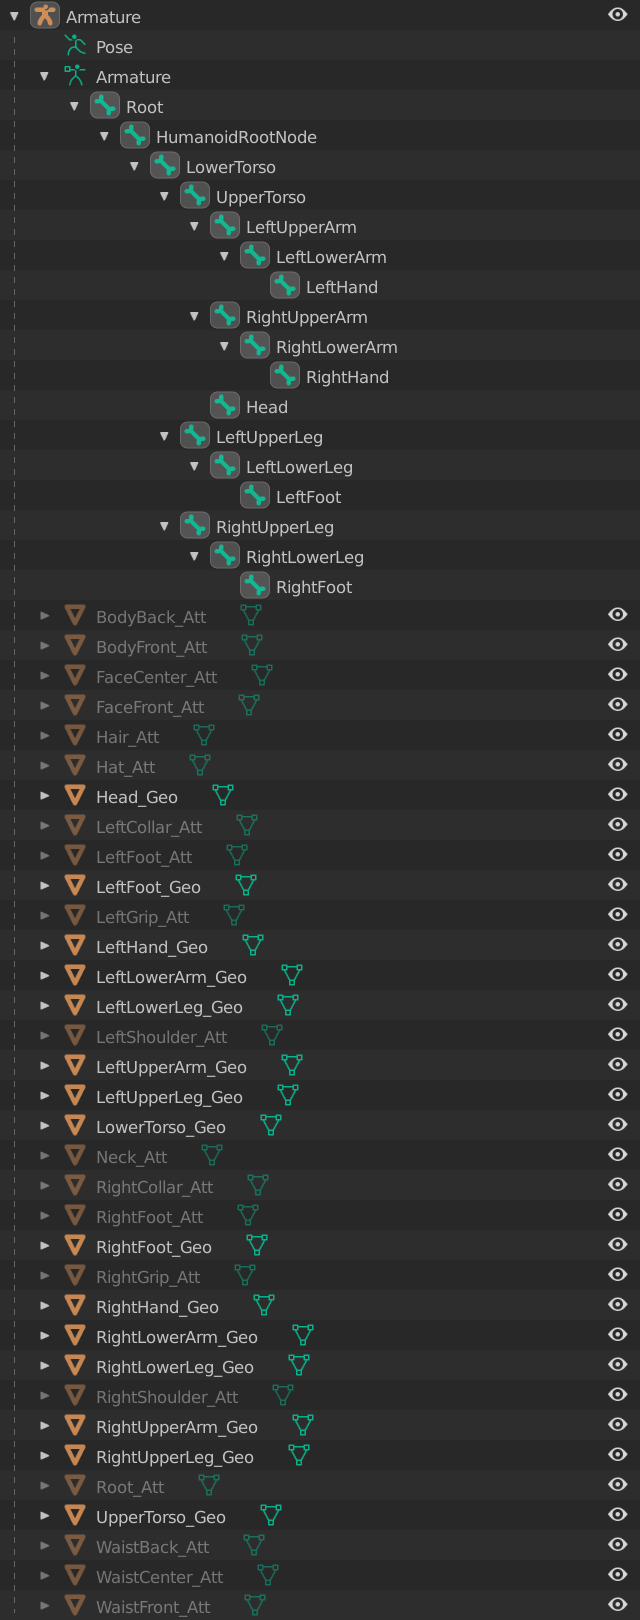
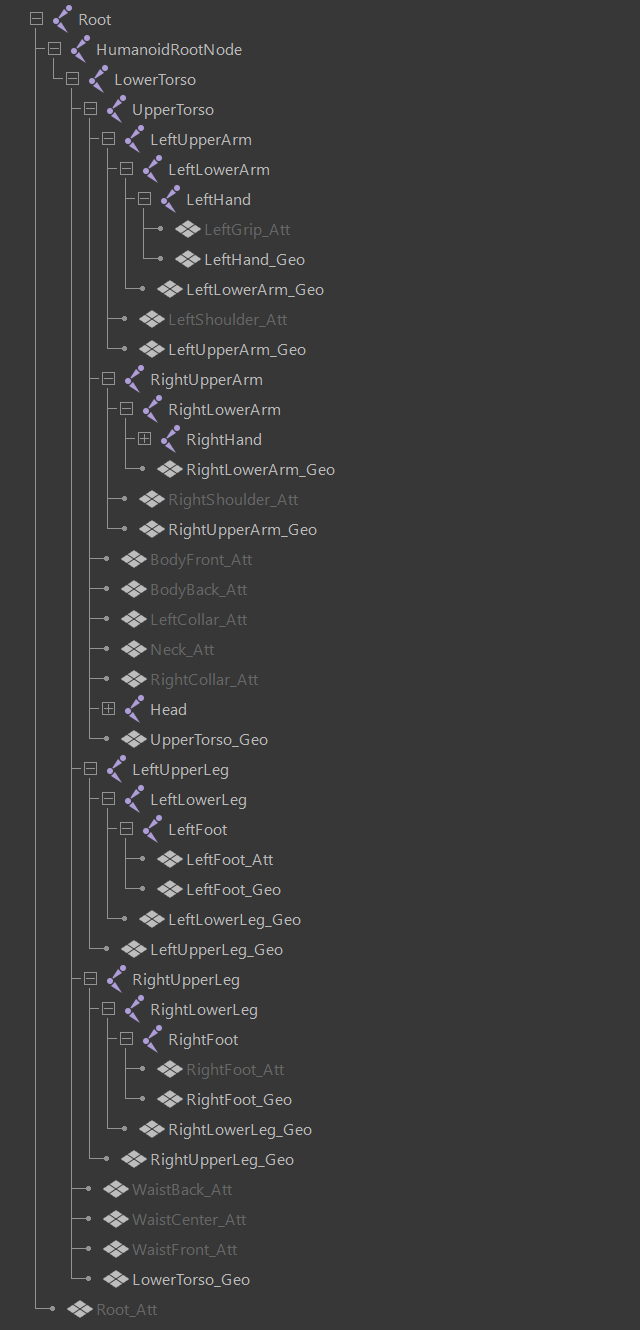
In overview, ensure that:
- All attachment meshes (those ending in _Att) should have the correct case-sensitive names according to the full model hierarchy below. This will ensure that Roblox character accessories attach properly to your model.
- The LeftGrip_Att and RightGrip_Att attachments have a 90° rotation on the X axis, meaning their rotation should be (90, 0, 0).
- The Root_Att attachment remains at the same position (unmoved) as Root, meaning its translations are (0, 0, 0).
- For compatibility with
articles/roblox avatars|R15animations, arms should be straight down rather than in a T-pose or A-pose.
Custom Rig Setup
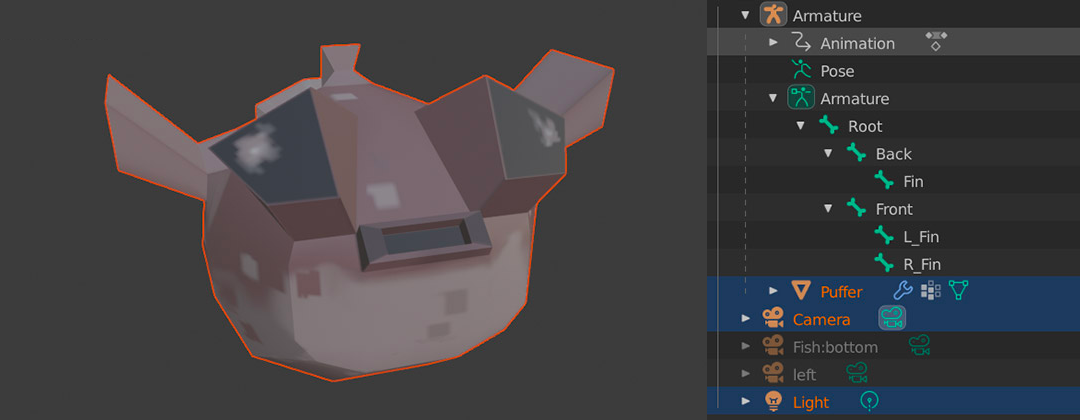
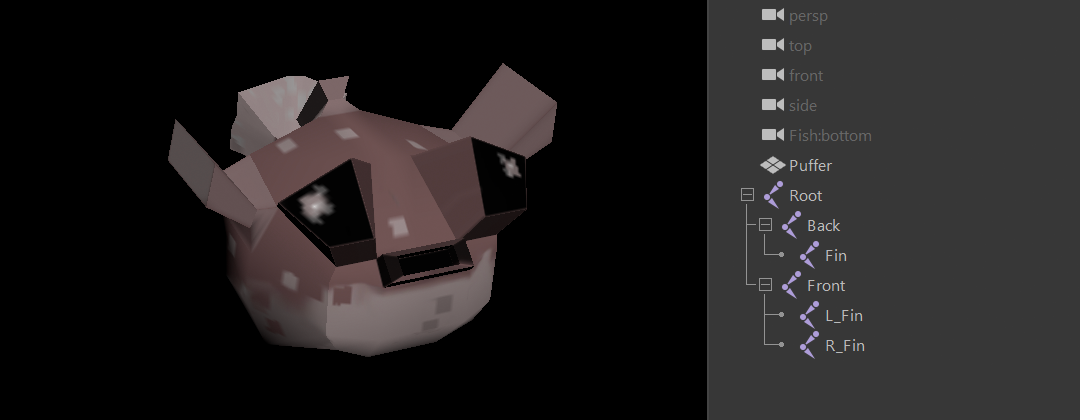
Custom rigs which don’t need to be starter characters nor compatible with articles/roblox avatars|R15 animations can have any amount of meshes/joints and no naming or hierarchy convention needs to be followed.
The puffer fish below happens to have one mesh and six bones.
Exporting Models
Please review the following guidelines depending on whether you’re exporting from Blender or Maya. Keep in mind that Studio will only be able to import one animation at a time. This will typically be the first track, so it’s recommended that you create separate exports for each animation.
Before exporting a character from Blender, make sure to set the units to Centimeters. Then, set the following in the Export → FBX window:
| Path Mode | |
|---|---|
| If you are exporting textures as embedded media, set Path Mode to Copy and click the box to its right so it looks like a paper is popping out (note that this only works for binary .fbx exports, not ASCII) | |
| Include | |
| Camera button | Off |
| Lamp button | Off |
| Bake Animation | |
| Disabled unless you intend to import animations to Studio | |
Before exporting a character from Maya, make sure to set the units to Centimeters. Models can be exported using the Game Exporter or File → Export All with the following settings:
| Geometry | |
|---|---|
| Smooth Mesh | Enabled |
| Referenced Assets Content | Enabled |
| Units | |
| Automatic | Enabled |
| Axis Conversion | |
| Up Axis | Y |
| FBX File Format | |
| Type | Binary |
| Version | Any FBX |
| Embed Media | |
| Embed Media | Enabled if exporting textures; when referencing files as part of the texture, they should be .png format |
| Animation | |
| Animation | Disabled unless you intend to import animations to Studio |
Importing to Studio
Once the rig is exported, it can be imported into Roblox via the Avatar Importer.
R15
To practice importing an articles/roblox avatars|R15 rig, download The Birdcaller example file and proceed as follows:
R15 Example File – The Birdcaller
- From the Plugins tab, click the Avatar Importer button.
- Click R15 from the four options.
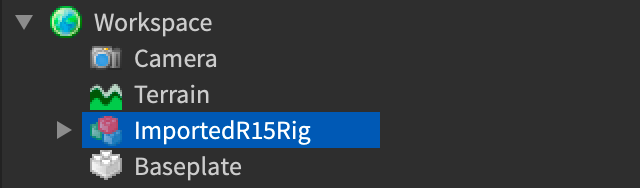
- Browse to the downloaded file (TheBirdcaller_Rigged.fbx). In Studio, it should import as ImportedR15Rig within the workspace.
Applying a Face Texture »
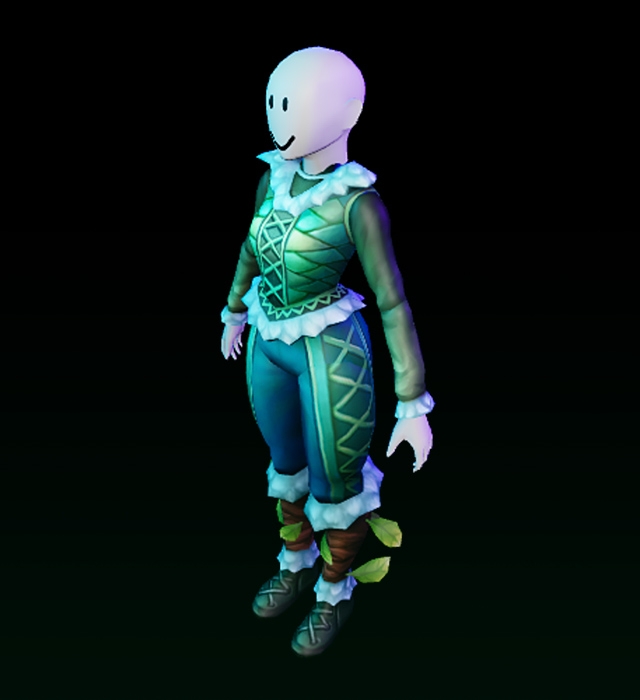
For rigs with a user-driven (customizable) 2D face, the texture must be applied to its face object within Studio.
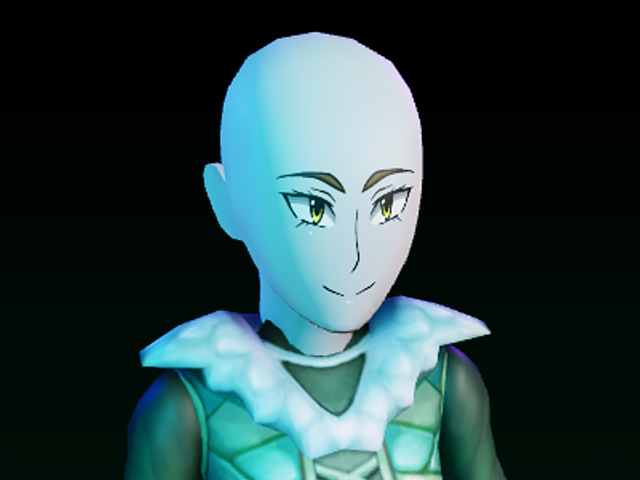
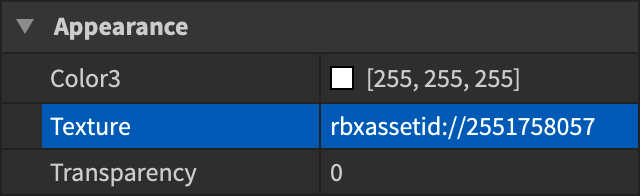
- Expand the Head branch of the imported character and select the face decal.
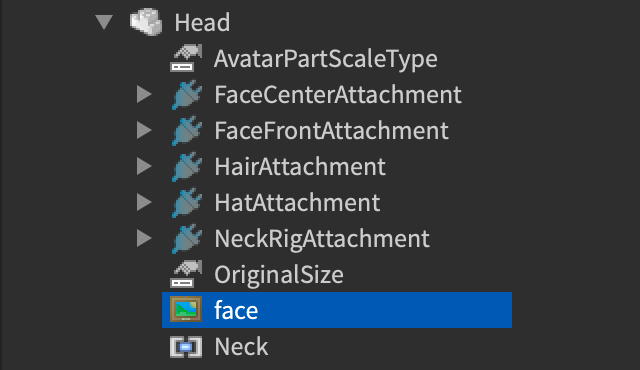
- Locate its Texture property and paste in a valid asset ID. This can be an image that you’ve uploaded or a facial image from the Avatar Shop. Once applied, it should appear as a face texture.
Testing in Studio »
Rigs that will be used as a player’s in-game character can be tested as follows:
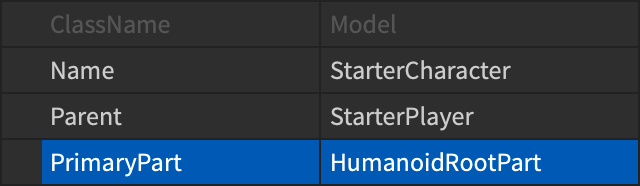
- Move the ImportedR15Rig into the StarterPlayer folder.
- Rename it to StarterCharacter and then playtest the game. If you get errors, make sure the model’s
Model/PrimaryPart|PrimaryPartis set to the HumanoidRootPart within the rig.
Custom
If articles/roblox avatars|R15 compatibility is not necessary, follow the same process above but select Custom from the four options.
Importing Animations
Animations can be imported using the articles/using animation editor|Animation Editor and played back through a Humanoid or Animator as per regular part animations (see articles/using animations in games|Using Animations in Games).
When exporting an animation from a .fbx, it’s important to consider:
- Studio will only import the first track of any given .fbx.
- Export time is proportional to FBX size (joints and frames)
- Exporting under your name will mean only you have access and can view the animations in Studio.
- You will still need to clean up your character after you’ve finished the export by removing the vestigial “AnimSaves” folder if you also intend on using the same character model for your place file.
To import animations from a .fbx, follow these steps:
- From the Plugins tab, click Animation Editor.

- Select the imported rig in Studio.
- If prompted, type in a new animation name and click Create in the dialog.
- Click the
 button in the upper-left section of the editor window, then select Import → From FBX Animation.

- Browse to and select the desired .fbx file.