Intro to Plugins
Intro to Plugins
A plugin is a custom add-on to Studio which introduces new features above and beyond normal Studio functionality. You can either install community-made plugins or create your own.
Finding and Managing Plugins
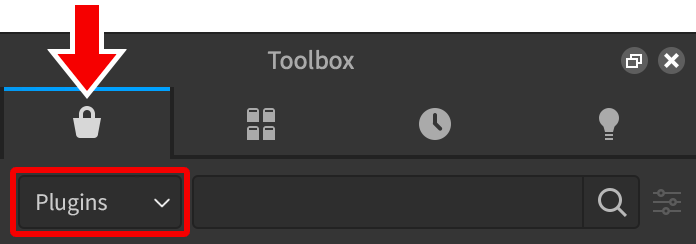
You can find new plugins in the Toolbox by clicking the Marketplace tab and selecting Plugins from the menu.
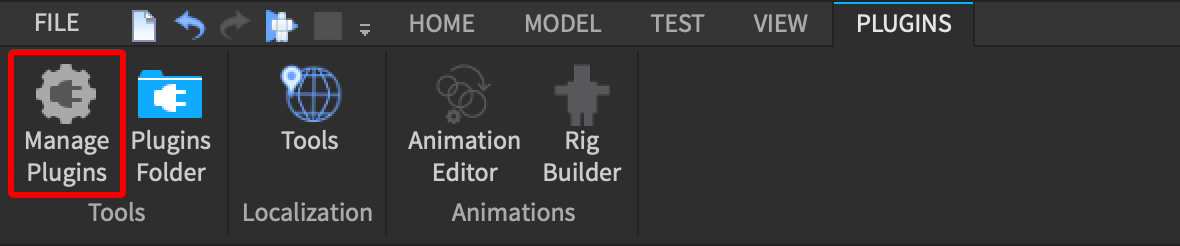
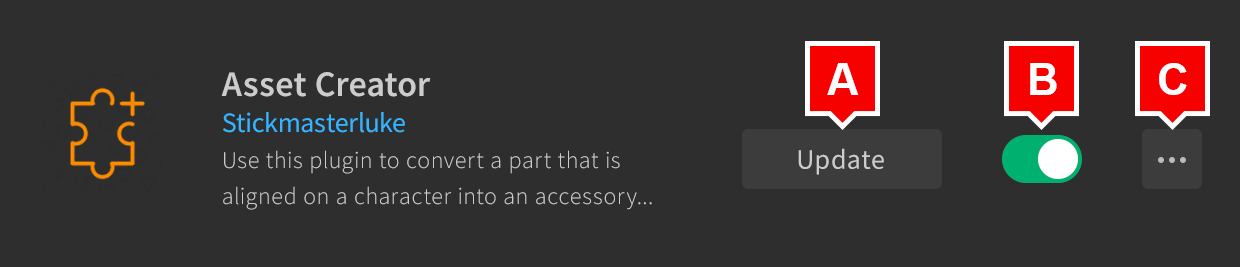
Once installed, you can manage/update a plugin through the Manage Plugins button in the Plugins tab.
Creating New Plugins
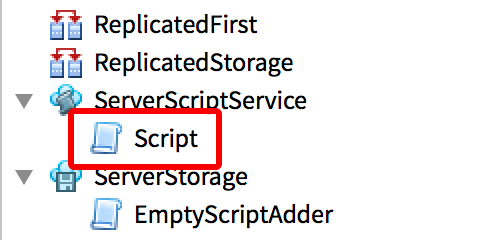
In addition to using pre-built plugins, you can create your own plugins for a wide range of purposes. In this section, you’ll create a simple plugin that inserts a new script into ServerScriptService without the default “Hello world!” print function.
Saving a Plugin Script
- All plugins start from a
Script, so create a new instance insideServerStorage. - Rename the script EmptyScriptAdder.
- Right-click on the script and select Save as Local Plugin.
- Click Save to insert the plugin script into your plugins folder. The Output window will indicate that the plugin was successfully saved and “Hello world!” will also appear in the output — this is actually the plugin running for the first time.

Adding a Toolbar Button
It’s often convenient to hook up plugins to a Studio toolbar button. This can be done through Plugin/CreateToolbar|Plugin:CreateToolbar() and PluginToolbar/CreateButton|PluginToolbar:CreateButton().
- Open the EmptyScriptAdder script and delete
print("Hello world!"). - Copy and paste the following code into the script:
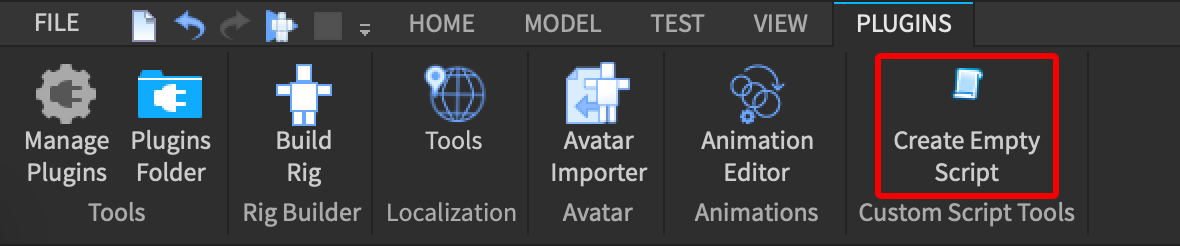
- Save the plugin again (right-click EmptyScriptAdder and select Save as Local Plugin). When complete, the button will appear in the Plugins tab of Studio:
Modifying Plugin Behavior
The plugin doesn’t do anything yet, so you’ll need to connect a function to the button’s PluginToolbarButton/Click|Click event which creates a new Script instance, sets its Script/Source|Source property to an empty string, and parents it to ServerScriptService.
Once again, save the plugin via Save as Local Plugin. Now when you click the Create Empty Script plugin button, it inserts a new Script into ServerScriptService.
Supporting Undo/Redo
Undo and redo in Studio are managed by waypoints in ChangeHistoryService. After every action in Studio, such as the user dragging a part or inserting a new object, Studio automatically adds a waypoint. When you undo an action, Studio goes back to its last waypoint and undoes everything that happened afterward.
The exception with plugins is that they do not add new waypoints by default. If a plugin makes a change to a place and the user activates Undo, Studio will undo the last non-plugin action and everything the plugin did.
To make sure Studio can cleanly undo a plugin’s action:
- Reference
ChangeHistoryServiceon the first line. - Call
ChangeHistoryService/SetWaypoint|SetWaypoint()in the final line of theonNewScriptButtonClicked()function.
Using a Selection
Plugins can use the Selection service to find out what objects the user has selected. The following modification checks if the user has anything selected and creates the new script as its child, instead of inside ServerScriptService.
Publishing to Roblox
Just like places and models, plugins can be published to Roblox to make them easy to share and install.
- Right-click on the plugin script and select Publish as Plugin from the menu.
- If desired, upload a 512×512 image by clicking the image in the upper-left corner of the window.
- Enter a title and description for the plugin, making sure you clearly express what the plugin does.
- For the Creator field, select an option:
- Select Me to retain personal ownership.
- Select a
articles/Group Games|groupto collaborate on the plugin with members of that group.
- If you want the plugin to be visible to other developers in the marketplace and Toolbox, click the Sales button in the left column and toggle on the Sale option.

- When ready, click the Submit button.